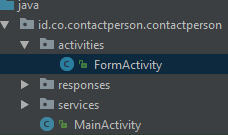
- Pertama buat sebuah package baru dengan nama activities.

- Lalu buatlah sebuah activty (Empty Activity) dalam folder activities dengan nama FormActivity


- Lalu masuk ke app > res > layout > activity_form.xml . Masukkan source code di bawah
<?xml version="1.0" encoding="utf-8"?>
<LinearLayout xmlns:android="http://schemas.android.com/apk/res/android"
    xmlns:app="http://schemas.android.com/apk/res-auto"
    xmlns:tools="http://schemas.android.com/tools"
    android:layout_width="match_parent"
    android:layout_height="match_parent"
    android:orientation="vertical"
    android:padding="20dp"
    tools:context="id.co.contactperson.contactperson.activities.FormActivity">

    <android.support.design.widget.TextInputLayout
        android:layout_width="match_parent"
        android:layout_height="wrap_content">

        <EditText
            android:id="@+id/et_name"
            android:layout_width="match_parent"
            android:layout_height="wrap_content"
            android:hint="Nama :"
            android:inputType="textPersonName"
            android:maxLines="1"
            android:singleLine="true" />

    </android.support.design.widget.TextInputLayout>

    <android.support.design.widget.TextInputLayout
        android:layout_width="match_parent"
        android:layout_height="wrap_content">

        <EditText
            android:id="@+id/et_contact_number"
            android:layout_width="match_parent"
            android:layout_height="wrap_content"
            android:hint="No Telp :"
            android:inputType="number"
            android:maxLength="15"
            android:singleLine="true" />

    </android.support.design.widget.TextInputLayout>

    <Button
        android:id="@+id/btn_simpan"
        style="?android:textAppearanceSmall"
        android:layout_width="match_parent"
        android:layout_height="wrap_content"
        android:layout_marginTop="16dp"
        android:text="Simpan"
        android:textAllCaps="false"
        android:textStyle="bold" />

</LinearLayout>
- Lalu masuk ke app > res > layout > activity_main.xml . Masukkan source code di bawah
<?xml version="1.0" encoding="utf-8"?>
<FrameLayout xmlns:android="http://schemas.android.com/apk/res/android"
    xmlns:app="http://schemas.android.com/apk/res-auto"
    xmlns:tools="http://schemas.android.com/tools"
    android:padding="20dp"
    android:layout_width="match_parent"
    android:layout_height="match_parent"
    tools:context="id.co.contactperson.contactperson.MainActivity>

    <ListView
        android:id="@+id/lv_person_list"
        android:layout_width="match_parent"
        android:layout_height="wrap_content">

    </ListView>
</FrameLayout>
- Kemudian buat sebuah layout dengan nama item_person


- Lalu klik Finish .
- Lalu masuk ke app > res > layout >item_person.xml . Masukkan source code di bawah
<?xml version="1.0" encoding="utf-8"?>
<FrameLayout xmlns:android="http://schemas.android.com/apk/res/android"
android:layout_width="match_parent"
android:layout_height="wrap_content"
android:layout_marginTop="10dp">
<android.support.v7.widget.CardView
android:id="@+id/container"
android:layout_width="match_parent"
android:layout_height="wrap_content"
android:padding="10dp">
&lt;LinearLayout
android:layout_width="match_parent"
android:layout_height="wrap_content"
android:orientation="vertical"
android:padding="5dp"&gt;
<TextView
android:id="@+id/tv_name"
android:layout_width="match_parent"
android:layout_height="match_parent"
android:text="Nama :"
android:textSize="20sp"
android:textStyle="bold" />
<TextView
android:id="@+id/tv_contact_number"
android:layout_width="match_parent"
android:layout_height="match_parent"
android:text="No :"
android:textSize="20sp" />
</LinearLayout>
</android.support.v7.widget.CardView>
</FrameLayout>
- Buatlah sebuah package dengan nama adapters

- Buatlah sebuah file di dalam package adapters dengan nama PersonItemAdapter

- Masuk ke file PersonItemAdapter.java , kemudian isi dengan source code di bawah
public class PersonItemAdapter extends ArrayAdapter<Person> {

    private List<Person> personList;
    private Context context;
    private LayoutInflater layoutInflater;

    public PersonItemAdapter(@NonNull Context context, List<Person> persons) {
        super(context, R.layout.item_person ,persons);
        this.context=context;
        personList=persons;
        layoutInflater=LayoutInflater.from(context);
    }

    @Override
    public int getCount() {
        return personList.size();
    }

    @Nullable
    @Override
    public Person getItem(int position) {
        return personList.get(position);
    }

    @NonNull
    @Override
    public View getView(int position, @Nullable View convertView, @NonNull ViewGroup parent) {
        View view=convertView;

        if(view==null){

            view=layoutInflater.inflate(R.layout.item_person,null);
        }
        TextView name=view.findViewById(R.id.tv_name);
        TextView contactNunmber=view.findViewById(R.id.tv_contact_number);

        Person person=getItem(position);

        //Kasih nilai ke Person_item layout
        name.setText(person.getPersonName());
        contactNunmber.setText(person.getContactNumber());

        return view;
    }
}
- Masuk ke file MainActivity.java , kemudian isi dengan source code di bawah
public class MainActivity extends AppCompatActivity  {

    @BindView(R.id.lv_person_list)
    ListView lvPersonList;

    List<Person> personItemList;
    PersonItemAdapter personItemAdapter;


    @Override
    protected void onCreate(Bundle savedInstanceState) {
        super.onCreate(savedInstanceState);
        setContentView(R.layout.activity_main);
        ButterKnife.bind(this);

        //Masukkan adapter ke listView
        personItemAdapter = new PersonItemAdapter(this, personItemList);


    }

    @Override
    protected void onResume() {
        super.onResume();
        getAllPerson(generateToken());
        personItemAdapter.notifyDataSetChanged();
    }


    private String generateToken() {

        SecureRandom random = new SecureRandom();
        byte bytes[] = new byte[20];
        random.nextBytes(bytes);
        return bytes.toString();
    }

    public void getAllPerson(final String token) {

        ApiEndPoint apiEndPoint = ApiClient.getClient().create(ApiEndPoint.class);
        Call<ReadResponse> call = apiEndPoint.readRequest(token);

        call.enqueue(new Callback<ReadResponse>() {
            @Override
            public void onResponse(Call<ReadResponse> call, Response<ReadResponse> response) {

                final ReadResponse readResponse = response.body();

                if (readResponse != null) {
                    Log.d("Response Data ", "Total Data" + readResponse.getStatus());
                    if (readResponse.getStatus()) {

                        runOnUiThread(new Runnable() {
                            @Override
                            public void run() {

                                personItemList = readResponse.getPersons();

                                lvPersonList.setAdapter(new PersonItemAdapter(getApplicationContext(), personItemList));
                                personItemAdapter.notifyDataSetChanged();
                            }
                        });

                    } else {
                        Toast.makeText(getApplicationContext(), "Data Kosong", Toast.LENGTH_SHORT).show();
                    }

                } else {
                    Log.d("Login : ", "Data Null");
                }
            }

            @Override
            public void onFailure(Call<ReadResponse> call, Throwable t) {
                Toast.makeText(getApplicationContext(), "Koneksi Bermasalah", Toast.LENGTH_SHORT).show();

            }
        });
    }

}
- Lalu masuk ke app > manifests > AndroidManifest.xml . Tambahkan perizinan untuk koneksi ke internet<uses-permission android:name=”android.permission.INTERNET” />
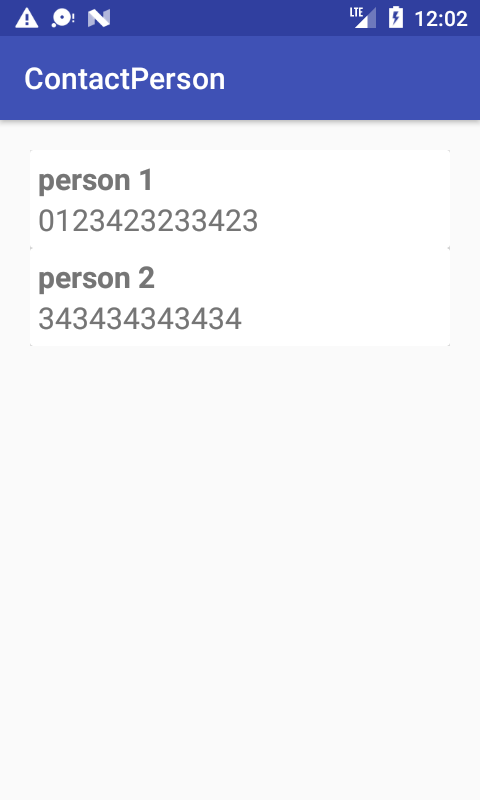
- Sekarang kita coba running dengan emulator . Klik tombol hijau yang ada di menu bar

- Pilih emulator yang ingin anda gunakan, lalu klik OK.